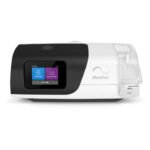
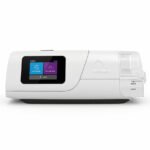
 Featured Machines
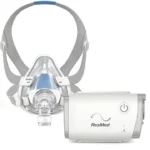 Travel CPAPs
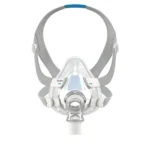
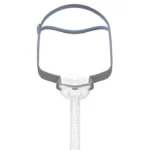 Most Popular Masks
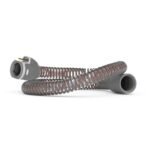
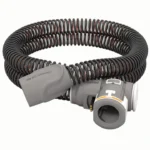 Tubes and Hoses
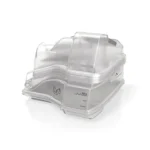 Humidifier Chambers
 Machine Filters
 Power Cords
 Headgear
 Nasal Pillows
 Cushions and Seals



Prepare for a Home Sleep Study With Confidence


A home sleep study is designed to fit into your real life: your own bed, your usual bedtime, and no overnight stay in a sleep center. Knowing how to prepare for a home sleep study can help the night feel less clinical and give your care team the clearest possible picture of your breathing during sleep.
The goal is not to create a perfect night. It is to capture a typical one. Follow the instructions that came with your specific device, keep your routine as normal as possible, and give yourself a little extra time before bed to get comfortable with the equipment.
What a Home Sleep Study Measures
Most home sleep apnea tests collect information about your breathing, airflow, blood oxygen level, heart rate, and sometimes your sleeping position or chest movement. The device may use a small sensor on your finger, a nasal cannula under your nose, and one or more belts or adhesive sensors placed around your chest.
This information helps a qualified clinician evaluate whether obstructive sleep apnea may be interrupting your breathing at night. A home test is especially useful for many adults with symptoms such as loud snoring, witnessed breathing pauses, waking up gasping, morning headaches, or persistent daytime fatigue.
It does have limits. Home testing is generally intended to identify obstructive sleep apnea and may not be the right choice for every sleep concern or medical history. If your results are unclear, or if your clinician suspects another sleep disorder, they may recommend additional evaluation. That does not mean you did anything wrong during the test.
How to Prepare for a Home Sleep Study
A few simple choices on testing day can make the process easier. Your device instructions should always come first, because setup steps vary by test. In general, plan for a normal evening with enough time to apply the sensors without rushing.
Keep your daytime routine steady
Try to follow your usual schedule on the day of your test. Eat your normal meals, complete your regular activities, and go to bed around your typical time. Avoid taking a long late-afternoon nap if that is not part of your normal routine, since it could make falling asleep more difficult.
Caffeine and alcohol deserve a little thought. If you typically have caffeine in the morning, you do not necessarily need to skip it. But avoid extra coffee, energy drinks, or late-day caffeine that could keep you awake. Alcohol can change breathing patterns and sleep quality, so it is usually best to avoid it on testing night unless your clinician has given you different guidance.
Take prescription medications as directed. Do not stop, start, or change a medication just for a sleep study without speaking with the clinician who prescribed it. This is particularly important for sleep medications, pain medications, anxiety medications, and anything that may affect breathing.
Set up your bedroom for an ordinary night
Choose the bed where you sleep most often. Make the room comfortable, quiet, and at your usual temperature. Charge the test device ahead of time if needed, and place the instructions where you can easily see them.
Give yourself about 20 to 30 minutes before your planned bedtime to review the setup. This small buffer can prevent the frustration of trying to read instructions when you are already tired. If your kit includes a mobile app, make sure your phone is charged and that you have completed any required pairing steps before you begin your bedtime routine.
You can usually sleep in your preferred position unless your care team tells you otherwise. Side sleepers, back sleepers, and people who change positions overnight can all complete a home test. The sensors may feel unfamiliar at first, but most people are able to sleep well enough for a useful recording.
Shower before applying sensors
A shower before bed can be helpful, particularly if your test includes adhesive sensors or a chest patch. Start with clean, dry skin so the adhesive can hold securely. Avoid applying lotion, body oil, petroleum jelly, or heavy moisturizer to the areas where sensors will be placed.
For men with significant chest hair, your kit instructions may include specific guidance. Do not shave or alter the placement area unless those instructions tell you to do so. Proper placement matters more than making adjustments on your own.
If you use facial moisturizer, apply it after checking whether the nasal sensor needs clean skin around your nose. Keep the area dry where the cannula or adhesive will rest.
Putting On Your Sleep Test Device
Read each step once before you begin. Then apply the sensors slowly, using a mirror if it helps. The equipment should feel secure but not painfully tight. A chest belt should sit flat against your body without restricting your breathing, and the finger sensor should be snug enough to stay in place without causing numbness or discomfort.
The nasal cannula is one part people often overthink. Position the small prongs just inside your nostrils, then loop the tubing around your ears as directed. It should rest gently. If the tubing pulls when you turn your head, use the provided tape or secure it according to the instructions.
Before you turn out the light, confirm that the device shows it is recording. Some systems use a light, screen message, or app notification. Do not assume recording has started simply because the device is powered on. If you are uncertain, check the troubleshooting guide or contact the support number included with your kit.
What to Do If You Wake Up During the Night
Waking up during a sleep study is common, and it does not automatically ruin the test. If you need to use the bathroom, leave the device on if you can safely do so and follow the directions for managing any cords or sensors. If a sensor comes loose, reattach it using the placement guide.
Try not to watch the clock repeatedly or judge the quality of your sleep. Many people feel as though they barely slept when they actually recorded enough usable data for interpretation. Your job is simply to wear the equipment as instructed and let the device collect information.
If the device completely stops, a major sensor comes off, or you are unable to restart recording, make a brief note of what happened if your kit provides a sleep diary. Then contact the testing provider the next morning. A repeat night may be needed in some cases, and that is a normal part of getting accurate results.
Common Mistakes That Can Affect a Home Test
The most common issue is starting too late and rushing through setup. Another is forgetting to activate recording. It also helps to avoid applying sensors over lotion-covered skin or placing them somewhere other than the illustrated location.
Do not test on a night when you are unusually sick with a severe cold, vomiting illness, or a major breathing flare-up unless your clinician advises you to proceed. Nasal congestion can make the nasal sensor less comfortable and may affect how representative the night is. Mild congestion is often manageable, but follow the instructions from your care team.
If you normally use CPAP or bilevel therapy, ask your clinician whether you should wear it during the test. Do not make that decision on your own. Testing requirements can differ depending on whether the study is for a new diagnosis, treatment follow-up, or a prescription-related need.
After You Complete the Study
When you wake up, follow the kit directions for ending the recording and packing the device. Return or upload the test promptly as instructed. Keep the device, sensors, and packaging together until you have confirmed that the test has been received.
A qualified clinician reviews the recording rather than relying on a consumer device score alone. If obstructive sleep apnea is identified, the next step may be a virtual consultation to discuss treatment options, including PAP therapy. For many people, an auto-adjusting CPAP machine, a comfortable mask, and ongoing support can turn treatment into a manageable home routine that supports deeper, more restorative sleep.
Sleep Restoration Center helps make that path feel more connected, from home testing and prescription support to therapy equipment and replacement supplies. The most useful thing you can bring to testing night is not perfection. It is a typical night of sleep, a properly applied device, and the confidence that clearer answers can lead to breathing better and feeling more rested.